In this article:
- Key Considerations for Camera Selection
- Precision in Pixels: Calculating Eye Detection Capability
- Unraveling the Dynamics: Frame Rate and Shutter Speed Alignment
- Interface Excellence: Selection Strategies and Popular Choices
- Decoding Optics: The Essence of Optical Lenses
- Navigating Camera Selection: Key Considerations Unveiled
- Summary
In the realm of AI-based embedded systems, the camera module stands out as a pivotal component. With a plethora of options available in the market, selecting the right camera module may seem like a daunting task. Fear not! This article is your guide to demystify the selection process, helping you make informed choices for your embedded application, ensuring compatibility with the powerful NVIDIA Jetson.
Key Considerations for Camera Selection
- Sensor:
The heart of any camera module lies in its sensor. Understanding the differences between the charge-coupled device (CCD) and active-pixel sensor (CMOS) is crucial for making the right choice.
- CCD Sensor: Pixel values in a CCD sensor are readable on a per-row basis. Each row of pixels undergoes a sequential shift into a readout register. This sequential process has its merits, particularly in specific applications.
- CMOS Sensor: In contrast, a CMOS sensor allows for individual and parallel reading of each pixel. This parallel reading capability offers advantages in terms of speed and efficiency, making CMOS sensors a preferred choice in various scenarios.
- Interface (Connector):
Choosing the right interface or connector is essential for seamless integration. Consider factors such as compatibility with your embedded system and the ease of connection.
- Optics:
Optics play a pivotal role in determining the quality of the captured images. Evaluate factors such as lens quality, focal length, and aperture to ensure optimal performance for your specific application needs.
CMOS Sensors: Cost-Effective and High-Performance
When it comes to sensors, the battle between CMOS and CCD unfolds, each with its strengths. CMOS sensors, known for their cost-effectiveness and energy efficiency, stand out without compromising image quality in the majority of use cases. Their parallel readout of pixel values also grants them the advantage of achieving higher frame rates, a key consideration for many applications.
Cost-Effective:
CMOS sensors offer a budget-friendly option without sacrificing image quality, making them a preferred choice for various industries.
Energy-Efficient:
Their energy efficiency contributes to prolonged device usage and reduced power consumption, aligning with sustainability goals.
High Frame Rates:
The parallel readout of pixel values allows CMOS sensors to achieve higher frame rates, ensuring smoother and more dynamic image capture.
CCD Sensors: Excelling in Specialized Scenarios
Despite the dominance of CMOS, CCD sensors have their niche, excelling in specific scenarios:
Long Exposure:
CCD sensors shine in situations requiring long exposure, delivering exceptional image quality in applications like astronomical photography.
Low-Noise Images:
In environments demanding exceptionally low-noise images, CCD sensors prove their worth, maintaining clarity and precision.
Understanding the strengths of each sensor type empowers decision-makers to choose the right technology for their specific needs. While CMOS sensors offer cost-effectiveness and high performance, CCD sensors excel in specialized scenarios, ensuring optimal image quality in every setting.
Electronic Shutter Options: Global vs. Rolling
When choosing an electronic shutter, the decision between global and rolling options plays a crucial role. A global shutter exposes each pixel simultaneously, avoiding motion blur and distortion. Meanwhile, a rolling shutter exposes pixel rows sequentially, potentially causing distortion, as illustrated in Figure 1 (Distortion of rotor blades caused by rolling shutter in a helicopter). While global shutters simplify syncing multiple cameras, it’s essential to note that they are often pricier than their rolling shutter counterparts.

Colour vs. Monochrome Sensors: Balancing Data and Processing Speed
For machine vision tasks like fault detection and presence monitoring, a monochrome image sensor is often sufficient. Monochrome sensors allocate eight bits for each pixel, whereas colour sensors use three times the data (eight bits for red, green, and blue channels), leading to increased processing time and a slower frame rate. Carefully weigh the need for color against the desired frame rate when selecting a sensor for your application.
Dynamic Range: Enhancing Sensor Performance
Dynamic range, the ratio between maximum and minimum signals acquired, is pivotal for optimal sensor performance. In indoor applications, a High Dynamic Range (HDR) of at least 80dB is essential, ensuring accurate representation of intensity values. Outdoor applications, with varying light conditions, may necessitate a higher HDR of up to 140dB. Understanding dynamic range requirements ensures your machine vision system performs reliably across diverse environments.
Navigate the complexities of electronic shutters, sensor types, and dynamic range considerations to make informed choices for your machine vision needs. Achieve optimal performance while balancing cost-effectiveness and processing speed in your sensor selection.
Resolution Unveiled: Lighting, Pixel Size, and Optical Considerations
In the realm of machine vision, resolution is the linchpin for accurate object detail reproduction. Lighting conditions, sensor pixel size, and optical capabilities collectively influence a sensor’s resolution. As the object detail diminishes, the demand for higher resolution intensifies, making it a critical factor in machine vision applications.
Pixel Resolution: The Key to Sharp Images
Pixel resolution, denoting the size of each pixel in millimeters, holds the key to image sharpness. A higher resolution results in a sharper image, ensuring finer details are captured. To guarantee adequate coverage, it’s imperative that the camera or sensor resolution spans an object feature with a minimum of two pixels.
Balancing Act: Resolution vs. Frame Rates
High-resolution CMOS sensors often grapple with low frame rates, posing a challenge in capturing quality images. While achieving the necessary resolution is vital, ensuring sufficient frames per second is equally crucial. Evaluating the sensor’s speed becomes paramount to strike the right balance for optimal performance.
Rule-of-Thumb Guide: Determining Ideal Resolution
For a nuanced approach to resolution determination, consider the following rule of thumb outlined in Figure 2. The multiplier (2) signifies the typical preference for a minimum of two pixels on an object, ensuring successful detection and accurate representation in machine vision applications.
Master the intricacies of resolution in machine vision, understanding the impact of lighting, pixel size, and optics. Navigate the delicate trade-off between higher resolution and frame rates, utilizing a practical guide to determine the ideal resolution for your specific use case.
Resolution = 2x Field of View (FoV) \ Size of Feature of Interest
Figure 2. Sensor resolution required is determined by lens field of view and feature of interest size
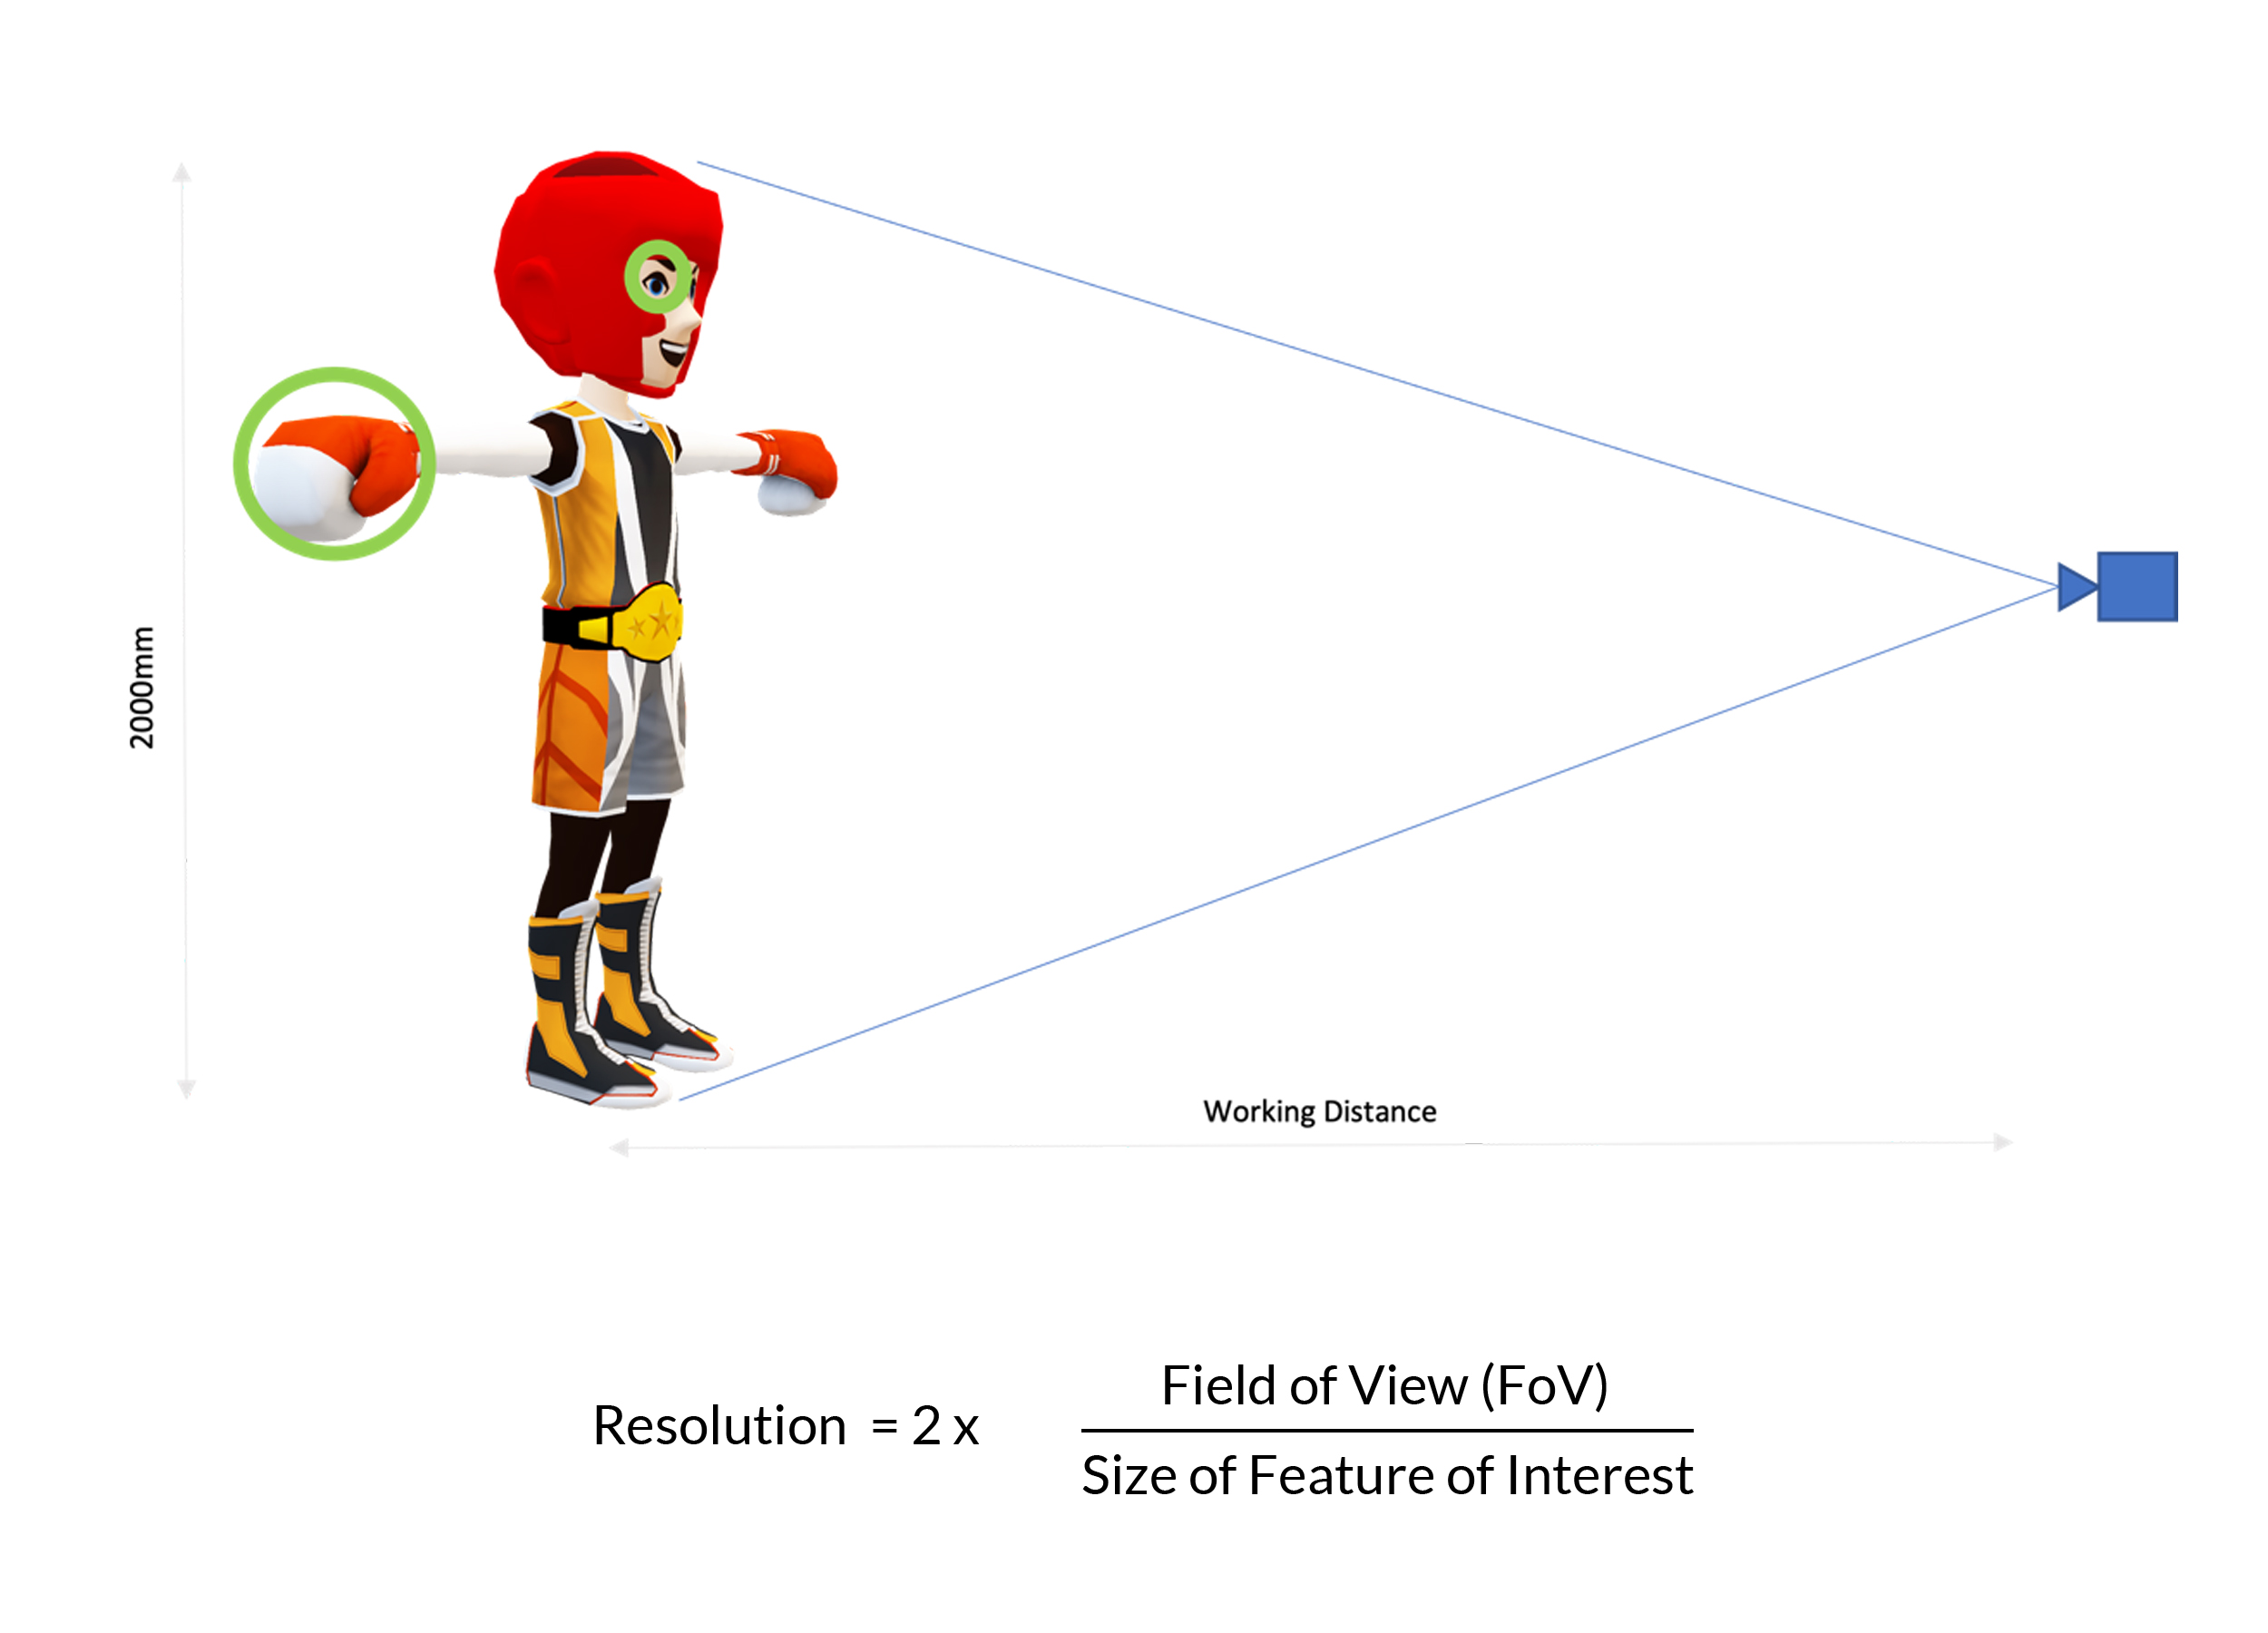
For example, suppose you have an image of an injury around the eye of a boxer.
- Resolution = 2x 2000 (FoV) \ 4
- FOV, mm = 2000mm
- Size of feature of interest (the eye), mm = 4mm
Precision in Pixels: Calculating Eye Detection Capability
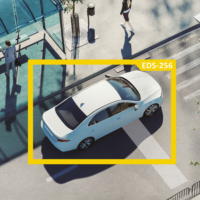
When it comes to eye detection, the calculation of 1000 x 1000 leads us to a strategic revelation – a one-megapixel camera offers optimal capability for detecting eyes using advanced computer vision (CV) or artificial intelligence (AI) algorithms. Uncover the precision that a well-calibrated camera brings to the realm of eye detection.
The Sensor Saga: Rows of Pixels and Photosites
A sensor’s anatomy consists of multiple rows of pixels, commonly known as photosites. These integral components play a pivotal role in determining the sensor’s performance. However, the quantity of photons a pixel collects is intricately linked to its size. While the allure of larger pixels is undeniable, it’s essential to navigate scenarios where opting for larger pixels might not be the most effective choice.
Balancing Act: Pixel Size Considerations for Optimal Results
Choosing the right pixel size is a delicate balance. While larger pixels may seem tempting for enhanced photon collection, they may not always be the optimal choice in every scenario. Dive into the nuances of pixel size considerations and understand how striking the right balance contributes to achieving precision and effectiveness in eye detection applications.
Navigate the intricacies of calculations and sensor considerations in eye detection, ensuring your approach aligns with the precision demanded by computer vision and artificial intelligence algorithms. Unleash the potential of a one-megapixel camera and grasp the delicate balance between pixel size and effective photon collection for optimal results.
| Small pixel | Sensitive to noise (-) | Higher spatial resolution for same sensor size (+) |
| Large pixel | Less sensitive to noise (+) | Less spatial resolution for same sensor size (-) |
Table 1. Pros and cons of small and large pixel size
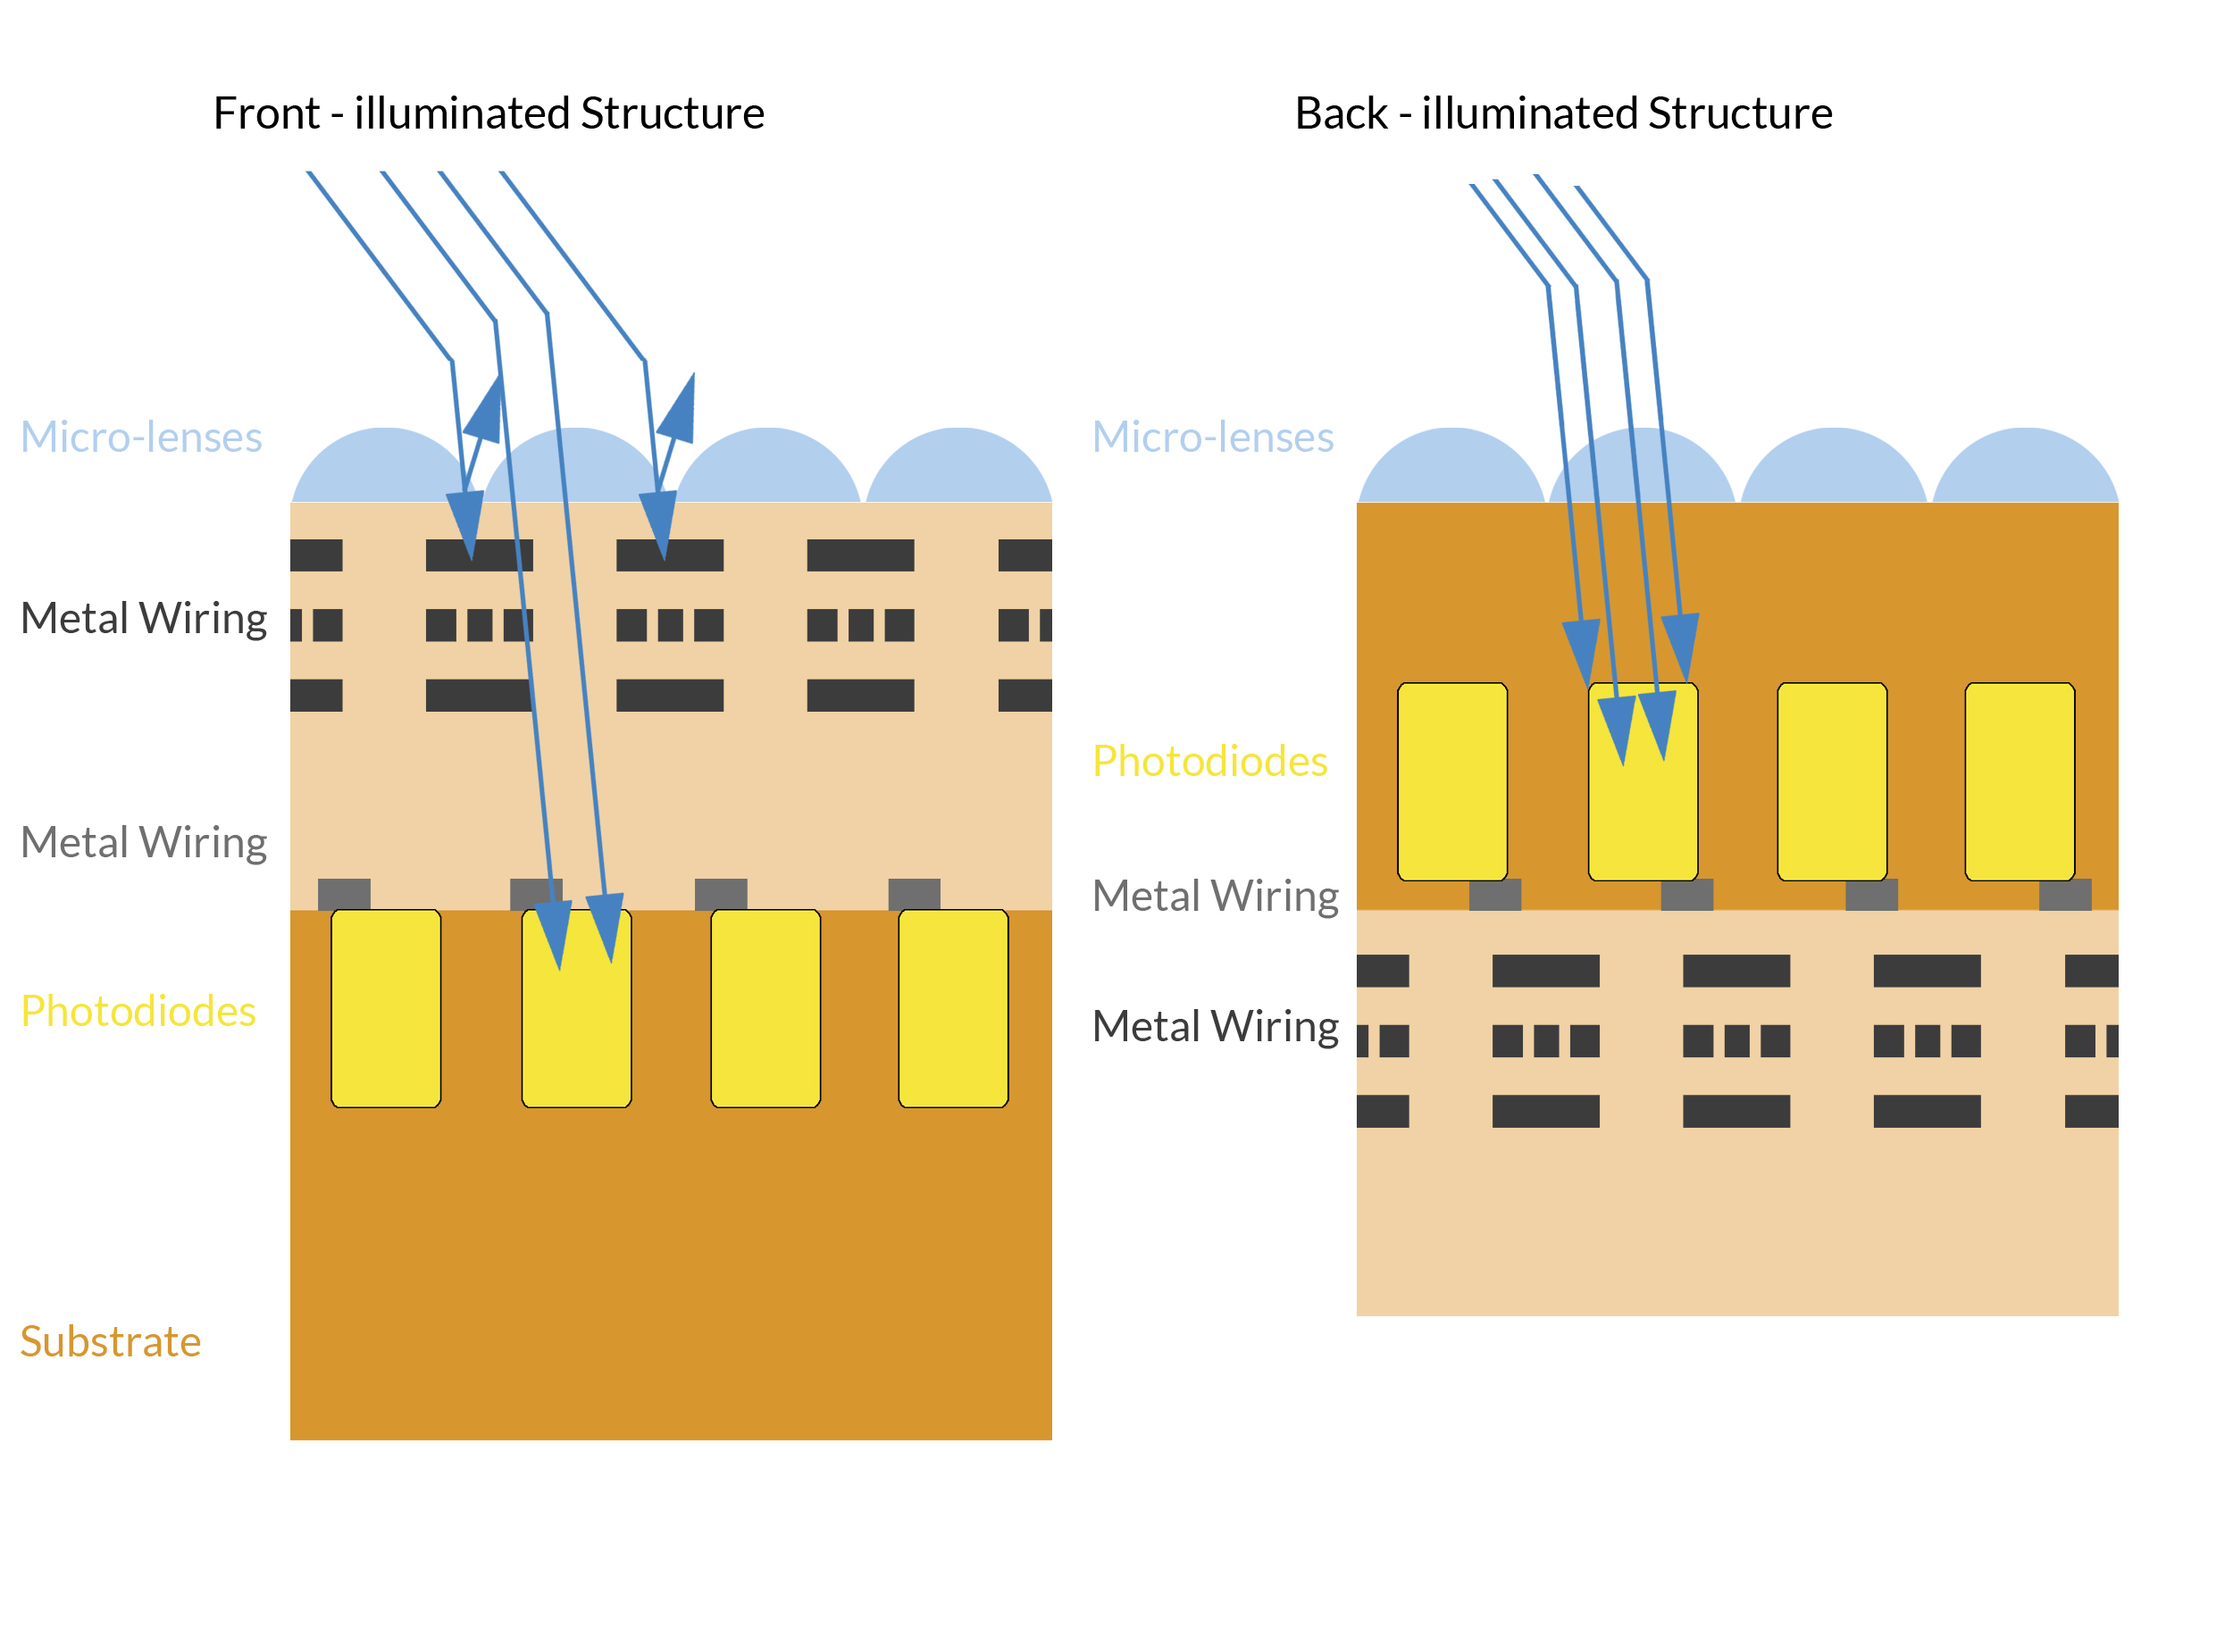
Shining Bright: Back-Illuminated Sensors and Light Maximisation
Back-illuminated sensors take center stage, showcasing unparalleled excellence in maximizing light capture and conversion by each photodiode. Explore the brilliance of this cutting-edge technology, offering superior performance and enhanced efficiency compared to front-illuminated alternatives.
Front vs. Back: The Metal Wiring Conundrum
While back-illuminated sensors reign supreme, front-illuminated counterparts encounter a limitation. Metal wiring strategically positioned above photodiodes becomes a potential obstacle, obstructing certain photons. This obstruction results in a reduction of overall captured light, impacting the sensor’s performance.
Sensor Selection Insights: Optimising Performance
Navigate the intricacies of sensor selection with a clear understanding of the advantages that back-illuminated sensors bring to the table. Uncover the potential pitfalls associated with metal wiring in front-illuminated sensors and gain insights to make informed decisions for optimal sensor performance in diverse applications.
Explore the brilliance of back-illuminated sensors and the impact of metal wiring on front-illuminated counterparts. Elevate your knowledge for enhanced sensor selection, ensuring your choice aligns with the light-maximizing capabilities demanded by cutting-edge technology.
Unraveling the Dynamics: Frame Rate and Shutter Speed Alignment
In the realm of machine vision, frame rate, measured in frames per second (FPS), holds the key to efficient inspections. Explore the critical connection between frame rate and the required number of inspections, intricately linked to shutter speed – the time the camera sensor is exposed for image capture.
Real-World Challenges: Maximising Achievable FPS
Theoretically, maximum frame rate and exposure time share an inverse relationship. However, achieving the desired FPS faces real-world challenges such as latency from frame readout, sensor resolution, and interface data transfer rates, including cabling considerations. Discover strategies like additional lighting and pixel binning to mitigate the need for lengthy exposure times and boost FPS.
Sensor Advantages: CMOS vs. CCD in FPS Race
CMOS sensors take the lead in the race for higher FPS, leveraging faster pixel readout compared to the charge transfer process in a CCD sensor’s shift register. Gain insights into the advantages that make CMOS sensors a preferred choice for achieving superior frame rates in machine vision applications.
Interface Excellence: Selection Strategies and Popular Choices
Connecting camera modules to embedded systems demands strategic interface selection. USB and Ethernet interfaces are commonly favored for evaluation, eliminating the need for custom driver development. Delve into crucial parameters like transmission length, data rate, and operating conditions, as outlined in Table 2, to make informed decisions for seamless integration.
Embark on a journey into the intricate dynamics of frame rate, shutter speed, and interface considerations in machine vision. Elevate your understanding, align frame rates with inspection needs, and make optimal interface selections for flawless camera module integration into embedded systems.
| Features | USB 3.2 | Ethernet (1 GbE) | MIPI CSI-2 | GMSL2 | FPDLINK III |
| Bandwidth | 10Gbps | 1Gbps | DPHY 2.5 Gbps/lane CPHY 5.71 Gbps/lane | 6Gbps | 4.2Gbps |
| Cable length supported | < 5m | Up to 100m | <30cm | <15m | <15m |
| Plug-and-play | Supported | Supported | Not supported | Not supported | Not supported |
| Development costs | Low | Low | Medium to high | Medium to high | Medium to high |
| Operating environment | Indoor | Indoor | Indoor | Indoor and outdoor | Indoor and outdoor |
Table 2. Comparison of various camera interfaces
Decoding Optics: The Essence of Optical Lenses
In imaging systems, optical lenses play a pivotal role in gathering scattered light and reconstructing images on light-sensitive sensors, whether CCD or CMOS. Choosing the right lens involves a complex interplay of factors, including focal length, sensor format, field of view, aperture, chief ray angle, resolving power, and distortion.
The Lens Spectrum: Standard Focal Lengths and Choices
Optical lenses come in a finite set of standard focal lengths, such as 6mm, 8mm, 12.5mm, 25mm, and 50mm. These choices form the spectrum, and selecting the lens with a focal length closest to your imaging system’s requirements is the initial step.
Focusing Dynamics: Adjusting Working Distance for Precision
Once the optimal focal length is identified, adjustments to the working distance become imperative to bring the object under inspection into focus. It’s crucial to note that lenses with shorter focal lengths, particularly less than 12mm, may introduce noticeable distortion in the captured images.
Distortion Challenges: Strategies for Sensitivity
In scenarios where distortion sensitivity is paramount, increasing the working distance and opting for a lens with a higher focal length is recommended. However, if altering the working distance poses challenges, the choice of an optimised lens becomes a strategic constraint.
Embark on a journey into the intricacies of optics for imaging systems, gaining insights into focal lengths, working distances, and distortion considerations. Elevate your lens selection process for CCD or CMOS sensors, ensuring impeccable imaging results in diverse applications.
applications.
| Wide-angle lens | Normal lens | Telephoto lens | |
| Focal length | <=35mm | 50mm | >=70mm |
| Use case | Nearby scenes | Same as human eye | Far-away scenes |
Table 3. Main types of camera lenses
Precision Attachment: The Crucial Role of Lens Mounting Systems
Attaching a lens to a camera goes beyond a mere connection; it demands a specific mounting system. Mechanical stability takes center stage in this process, as a loosely attached lens can jeopardize image focus. Additionally, precision in defining the distance to the sensor is paramount for optimal results.
Industry Standards: Lens Mounts for Seamless Compatibility
To ensure compatibility across a myriad of lenses and cameras, industry-standard lens mounts have become the bedrock. These standardized mounts play a pivotal role in guaranteeing a seamless attachment process and precise alignment between lenses and cameras. Dive into the world of standardized mounts for a hassle-free and precise lens-camera connection.
| Most popular | For industrial applications | |
| Lens mount | M12/S mount | C-mount |
| Flange focal length | Non-standard | 17.526mm |
| Threads (per mm) | 0.5 | 0.75 |
| Sensor size accommodated (inches) | Up to ⅔ | Up to 1 |
Table 4. Common lens mounts used in embedded space
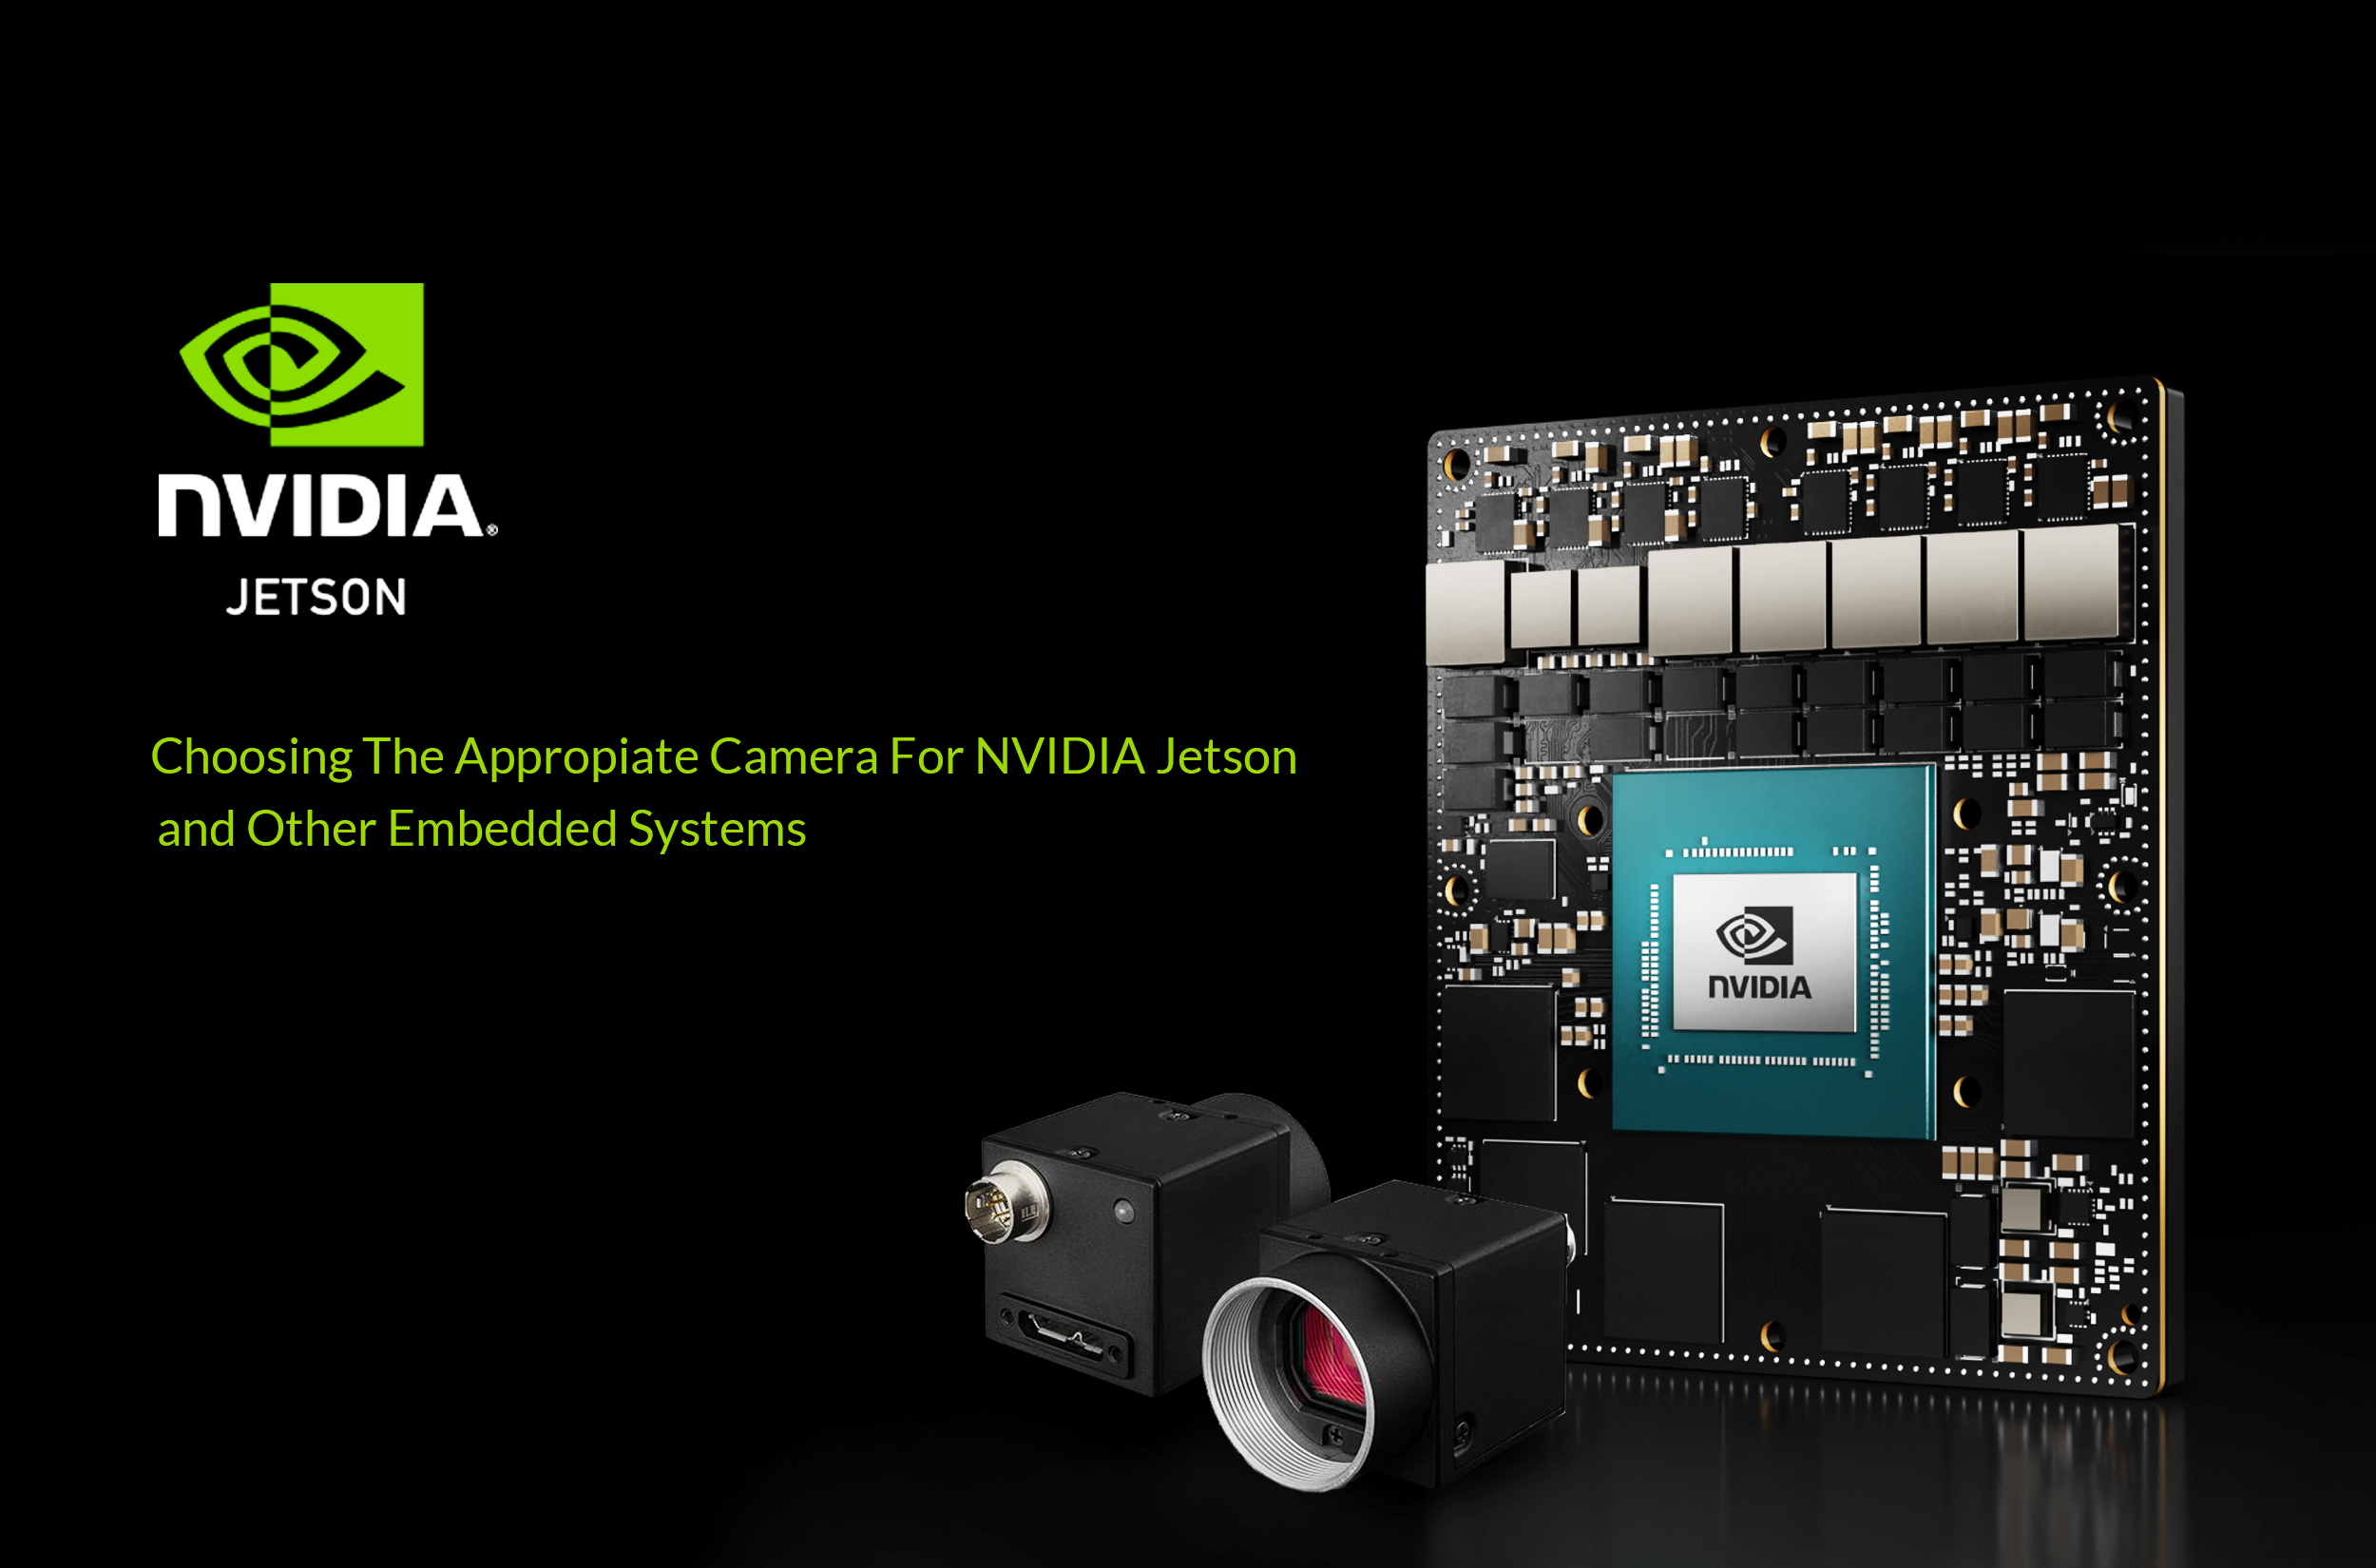
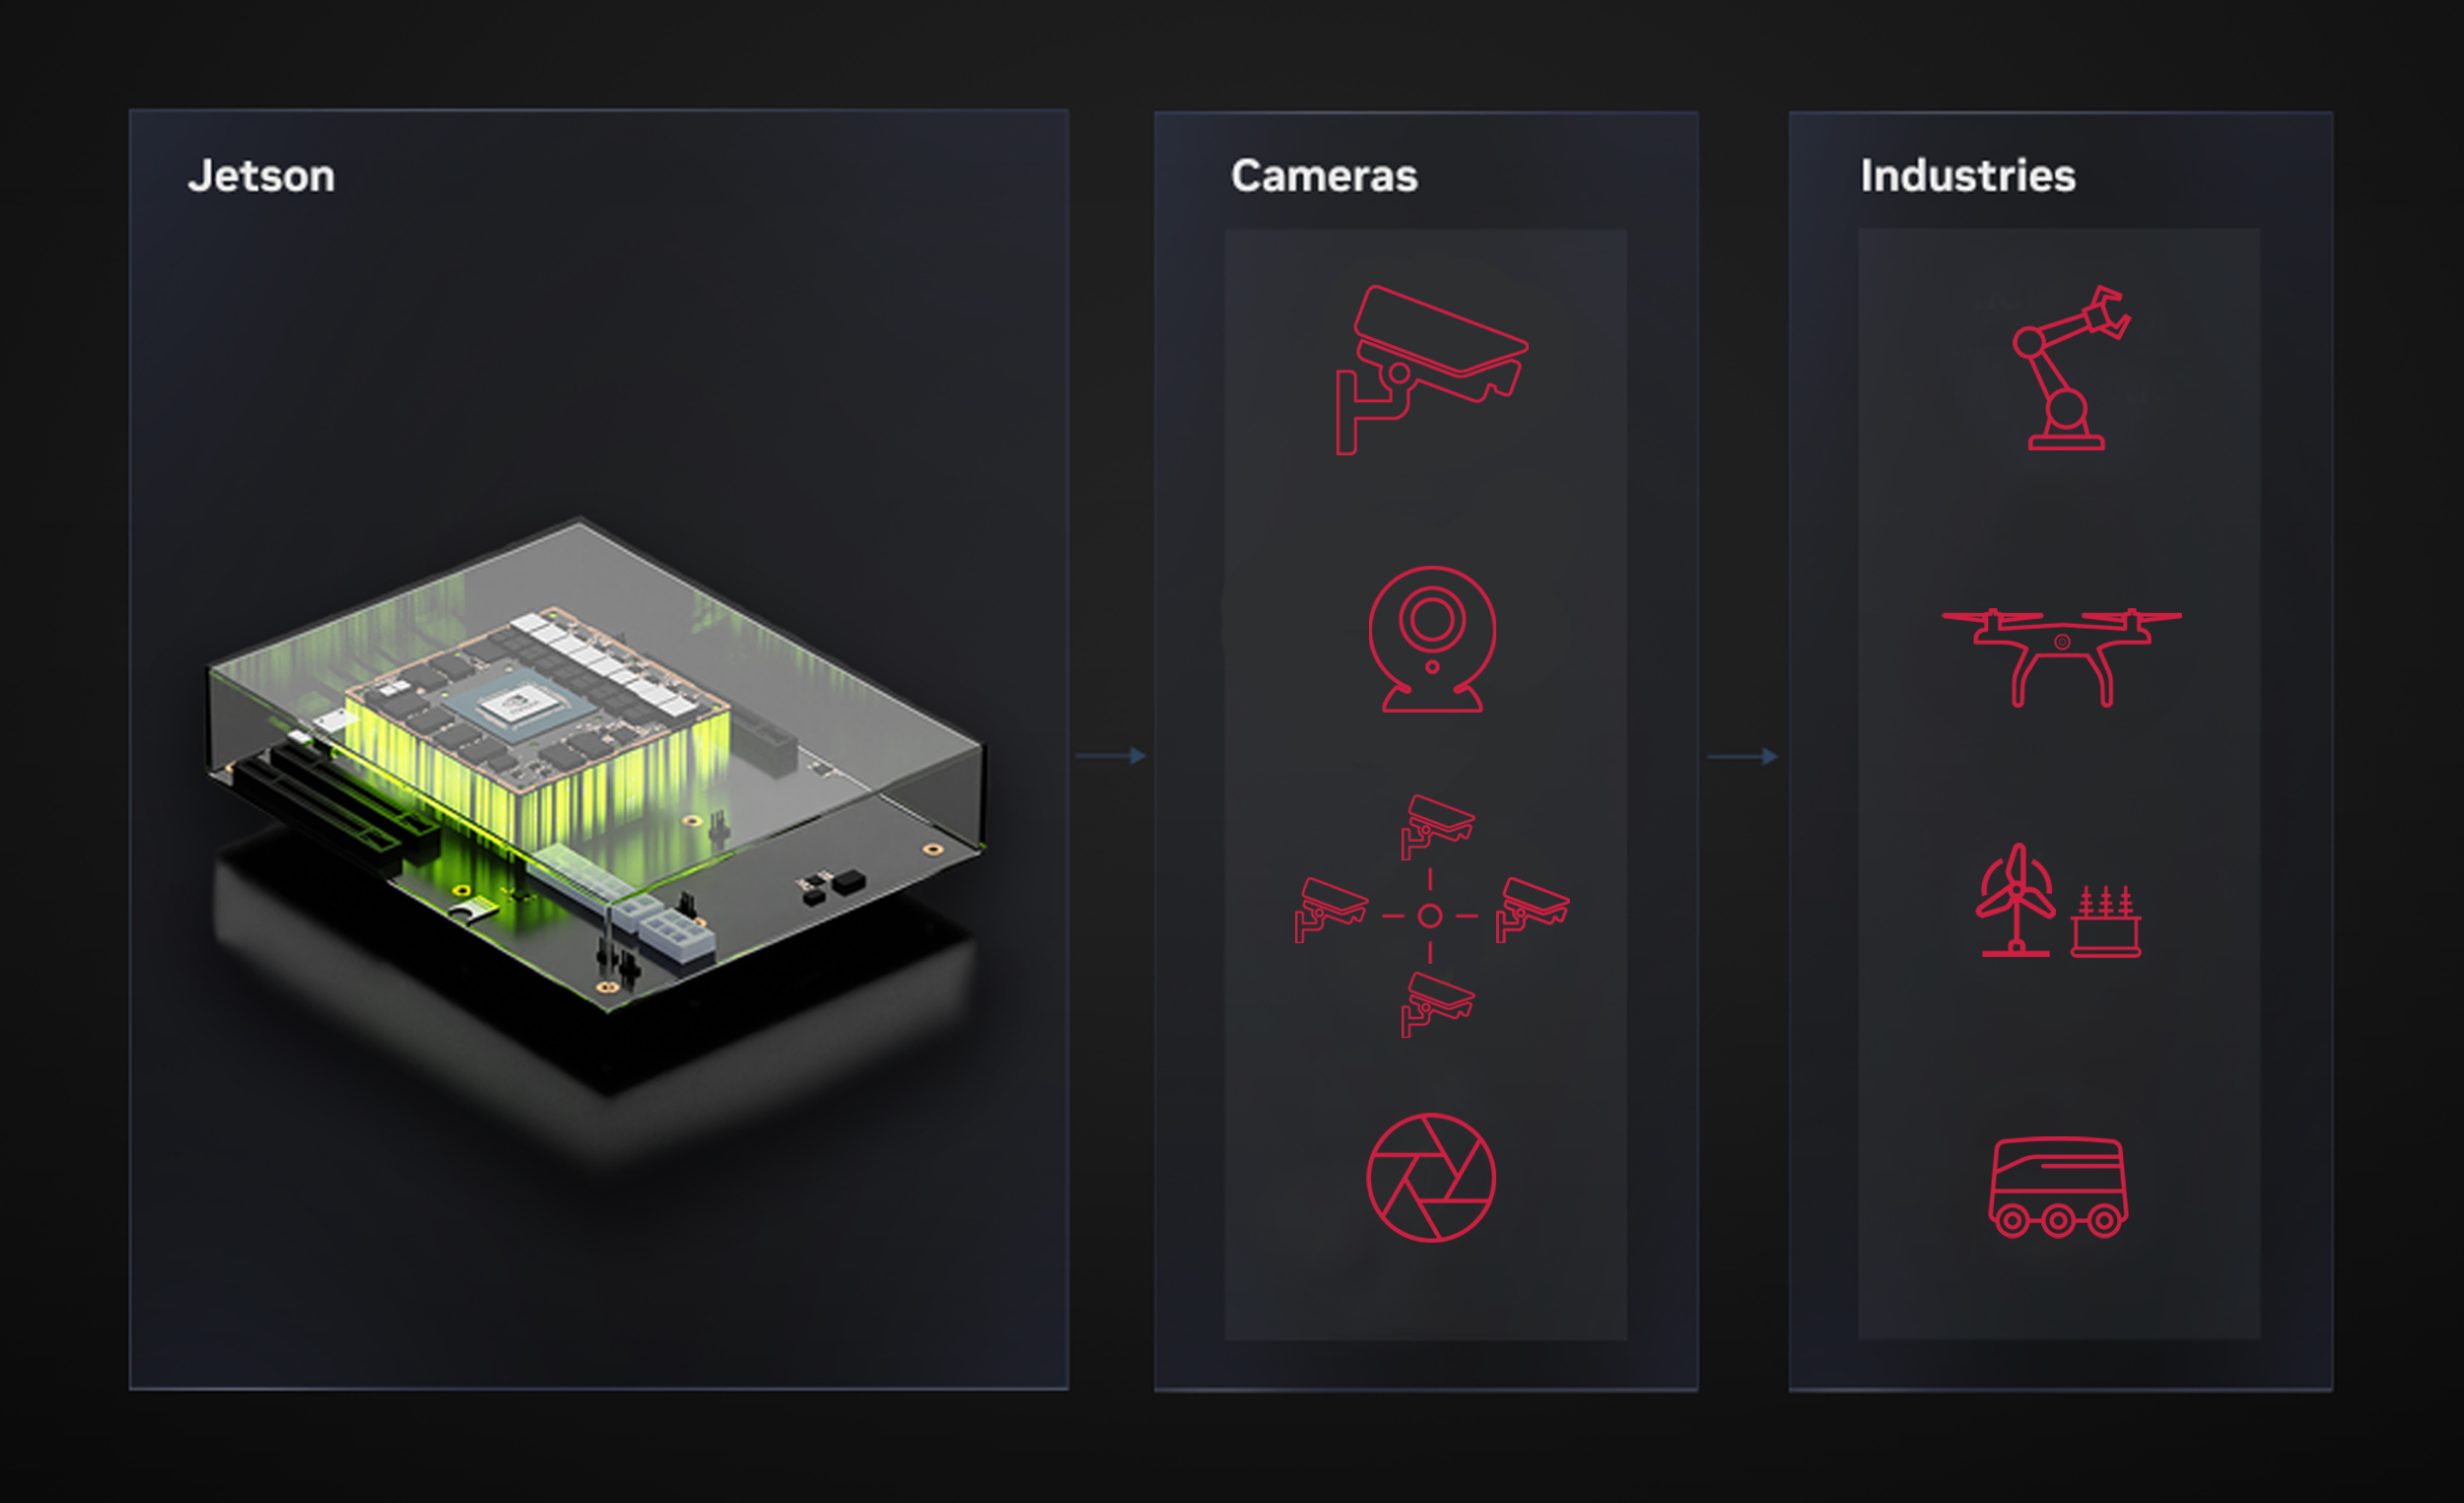
Figure 4. NVIDIA Jetson in combination with camera modules can be used across industries for various needs
Navigating Camera Selection: Key Considerations Unveiled
Choosing the right camera for your project is a crucial step in system integration. This post simplifies the process by highlighting essential factors, such as design, performance, environment, and cost. Uncover the key limits that form the foundation for a successful camera choice.
Tailoring Features for Your Unique Needs
Once you grasp the foundational limits, focus on features that align with your project’s specific requirements. For remote setups or challenging environments, consider the efficiency of the GMSL interface. In low-light conditions, opt for cameras with larger pixels and sensors. And for dynamic applications, explore the advantages of a global shutter option.
Summary
While the camera selection process may initially seem overwhelming, understanding your project’s unique constraints is the first step. Decode the intricacies, weigh the limits, and then tailor features to match your specific needs. This guide has hopefully simplified the decision-making process, ensuring you choose a camera that perfectly aligns with your project goals.